Unifrost Ice Machine, Bin, and Water Filter Setup: A Checklist for New Irish Installations

Discover step-by-step guidance for setting up Unifrost ice machines, bins, and filters in Irish commercial sites.
Unifrost Ice Machine, Bin and Water Filter Setup Checklist for Irish Installations
You are not just installing an ice machine. You are setting up an ice system that has to produce safe, consistent ice at service speed, without nuisance faults, leaks, scale build up, or hygiene issues that show up at inspection.
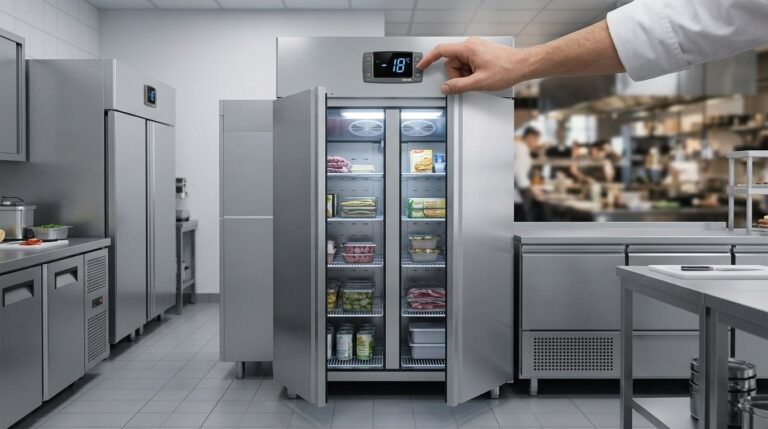
This checklist walks you through what to verify before your Unifrost kit arrives on site, how to position and connect common Unifrost models such as U40-15, UB25-15, U165-125 and U230-175, and how to match them with the right storage bin options like B175, B175OG, B275AIB and B375, plus the Unifrost water filter components you see most often on Irish installs including the SA30007 complete kit, I40002-CN main cartridge and SA950750 PP pre filter cartridges.
You will cover the real tradeoffs that affect cost and uptime, including whether your water needs pre filtration, where to put the unit for airflow and access, how to plan safe inlet and drain runs, how to flush and commission a new filter before first ice, how to secure a modular head on a separate bin, and what to document for insurance and Irish EHO food safety checks. It also flags the first week checks that confirm you are dialled in, such as cube quality, noise, bin fill behaviour and early signs of scale or poor drainage.
Why Unifrost Ice Machine Setup Matters
Ice machine setup is not a box-ticking exercise. You are installing a food-contact water system and a refrigeration system in one, so issues with siting, plumbing, drainage, ventilation, or filtration show up quickly as poor ice, nuisance faults, and avoidable call-outs.
From a compliance point of view, ice is treated as food. It must be made from potable water and handled hygienically under EU food hygiene rules (Regulation (EC) No 852/2004, Annex II on water and ice). That is why filter choice, drain integrity, and cleaning access are practical necessities, not “nice to haves”.
In Irish sites, the usual risks are familiar: tight back bars, warm plant areas, long drain runs, and variable water hardness that drives limescale in valves and on the evaporator. There is no single perfect setup. What works best depends on your service peaks, the ventilation you can realistically provide, and whether you are installing a self-contained unit (for example, U40-15/UB25-15) or a modular head and bin combination (for example, U165-125 or U230-175 on a B175 or B375).
Ice quality is a direct output of your water and your airflow
If the incoming water is not treated for your local conditions, you tend to see the same issues: cloudy cubes, off-tastes that show up most in spirits and mixers, and scale build-up that starts as a cosmetic problem and ends up restricting flow and interfering with harvest.
Airflow is the other half of it. If the machine is wedged into a hot corner beside a glasswasher, grinder, or undercounter heat source, it has to run harder to reject heat. The result is slower recovery when you are busy and more inconsistent cube formation across a shift.
Efficiency is mostly about avoiding hidden heat and water waste
Many ice machines end up in the least convenient space in the building, which is often the warmest space with the poorest ventilation. That drives longer runtimes and pushes more heat into already uncomfortable bar and kitchen areas.
The costs are not just on the electricity bill. Poor drainage falls, badly placed standpipes, or any back-pressure on the drain can cause intermittent stoppages and water waste. These are the sort of problems that only appear under pressure, typically when you are deep into a Friday night service and the unit is cycling frequently.
Longevity comes down to limescale control, drainage, and clean access from day one
In many Irish counties, water hardness is the slow killer of ice machines. It is far easier to control with the right filtration and a sensible commissioning routine than to try to “clean your way out” once scale has built up.
Just as important is leaving enough access to do the routine jobs properly: remove panels, sanitise the bin, and change cartridges such as the I40002-CN, along with pre-filters like the SA950750, without dismantling half the bar. If you make maintenance awkward, it slips. That is when small issues become breakdowns.
Getting these fundamentals right starts before the unit arrives on site, with a few checks around space, services, and what you are connecting into.
Essential Pre-Installation Checks
Confirm your water conditions and treatment plan, check the location is accessible and ventilated, and make sure you have a suitable cold water feed and a compliant drain route ready for the installer. Decide in advance where the filter kit will mount, how you will isolate the water for servicing, and how you will keep basic hygiene and maintenance records. Treat ice as a food item from day one. In Ireland, water used for making ice is covered under “drinking water” use, not a nice-to-have utility.
1. Verify your water source, quality, and hardness risk
Start by confirming whether the machine will be fed from mains, a group water scheme, or a private well. The reliability of supply and who is responsible for monitoring differs by source.
If you are on a private well or a small scheme and you have any doubts, plan a water check through the local authority or the HSE Environmental Health route. Citizens Information notes you can contact the local authority or HSE Environmental Health Officer to have a water supply checked, and it explicitly includes water used for “making ice” as drinking water use in Ireland (see its drinking water definition and monitoring guidance).
For hardness, don’t rely on kettle-scale as your only indicator. Flag likely hard-water areas early, then plan treatment and filter-change frequency accordingly. Geological Survey Ireland links groundwater hardness to limestone geology and provides a national reference via its Preliminary Groundwater Total Hardness Map.
2. Choose where the filter kit will mount and how it will be serviced
Before the machine arrives, pick an accessible, dry, well-lit mounting position for the filter kit. Someone needs to be able to change cartridges without moving the machine or crawling behind hot equipment.
Allow enough working space to:
isolate the water locally
relieve pressure
swap cartridges cleanly
flush to a drain without sending water across the floor
If you already have a “whole bar” filtration set-up, decide whether the ice machine will sit on a dedicated branch with its own isolation valve. In practice, this avoids the common headache where one blocked cartridge quietly starves the ice machine during service.
3. Confirm a proper water inlet and a compliant drain route (no “we’ll sort it later”)
You want a cold water feed with an isolation valve that’s easy to reach, not buried in a ceiling void, and not shared with equipment that causes pressure swings.
For drainage, confirm there’s a suitable waste point and that the route can be installed neatly with the right fall, without trip hazards, and without creating standing water behind the unit. If the only available drain is awkward, solve it before delivery. Drain problems usually show up as nuisance leaks, slow draining, odours, and avoidable call-outs.
4. Check access, handling, and siting constraints for your format (self-contained vs head + bin)
Do a route survey from the delivery point to the final position. Check door widths, tight corners, stairs, cellar hatches, and whether the unit needs to pass through a public area during trading.
This matters even more with modular heads and separate bins. Individual pieces may be manageable, but the real challenge is manoeuvring and positioning without damaging door frames, floors, or the unit itself.
If you’re fitting a head-and-bin set-up, confirm:
the floor is level where the bin will sit
the bin won’t be pushed into a hot corner
there’s enough clearance to open the bin door fully
staff can scoop ice hygienically without being bumped mid-service
5. Put EHO-ready hygiene controls and records in place before you serve the first ice
Set up a simple record system now, not after a complaint or an inspection. At a minimum, keep:
your water source noted (and any water test results you have)
what treatment/filtration is fitted
cartridge install and change dates
a cleaning and sanitising schedule for the ice machine and bin that staff can follow under pressure
Decide who owns the ice area day-to-day. If it’s everyone’s job, it tends to become nobody’s job. With these checks done, installation and commissioning is far less likely to be held up by plumbing surprises or basic hygiene gaps.
Setting Up Unifrost Ice Machines and Bins
Set up starts with matching the Unifrost ice machine to the right bin and service pattern, then making sure power, water and drainage are ready before the unit is moved into place. Install the correct Unifrost filtration components (SA30007 kit, with I40002-CN cartridge and SA950750 pre-filter where needed), flush the filter, then position, level and secure the machine and bin as one stable assembly. Finally, commission it with hygiene and records in mind. A unit can “make ice” and still cause problems later with cube quality, drain smells, scale, leaks, or paperwork.
1. Match the machine, bin, and service pattern before you lift anything
If you are installing an undercounter unit like the U40-15 or UB25-15, storage is typically integrated. Your main calls are location, ventilation and filtration.
If you are installing a modular head like the U165-125 or U230-175 onto a separate bin (for example B175, B175OG, B275AIB or B375/B375OG), treat it as two heavy commercial components that must work as one system.
In Irish bars and hotels, bin capacity often matters more in practice than the headline daily production figure. The bin is your buffer for peak bursts (Friday night, functions, cocktail rounds). A smaller bin can work where usage is steady and the machine has time to recover, but it becomes a weak point when staff are repeatedly opening the bin and warming the ice.
2. Prepare power, water inlet, and drainage to Irish expectations
Sort services first, then position the equipment.
Power: A dedicated supply and proper isolation is a sensible default in commercial kitchens and bars. Electrical work should be carried out to the current Irish wiring rules (National Rules for Electrical Installations set out in I.S. 10101:2020).
Water and drainage: Think in three lines:
Clean cold feed in
Drain out from the ice machine
Drain out from the bin (where applicable)
Your plumber should also address backflow risk. Ice machines are directly connected to potable supply, and backflow protection principles used in Ireland follow EN 1717 guidance referenced by Irish Water for protecting the public mains.
Practical detail that reduces call-outs:
Keep the drain run simple and consistently downhill.
Avoid long flat sections where biofilm builds and smells travel back.
If a pumped drain is your only option, decide that before delivery, not when the machine is half in place.
3. Install the Unifrost water filter kit and flush it properly before commissioning
Fit the SA30007 complete kit somewhere accessible, so the water can be isolated and cartridges changed without pulling the ice machine out.
If your site has sediment issues (after water works, older pipework, or where storage tanks are in use), the SA950750 PP cotton pre-filter can protect the main I40002-CN cartridge and the machine’s water path from blocking early.
Flush the new filter to waste before feeding the ice machine. This is less about “taste” and more about clearing carbon fines, trapped air and debris that can cause slow fill, inconsistent cubes, or early valve and spray issues.
If you are tying into an existing whole-building filtered system in a pub or hotel, keep the ice machine line separately isolatable. Make sure the final filter stage and flow path still suit the ice machine. When in doubt, treat the ice machine as a standalone critical appliance, not just another cold feed.
4. Position, level, and secure the bin and head as a single assembly
For modular combinations (for example U165-125 or U230-175 paired with B175 or B375), position the bin first and level it accurately. The head unit alignment follows the bin.
Even a slight level issue can show up later as:
Poor door seal
Awkward scoop access
Uneven fill patterns
“Intermittent” complaints that are actually installation-related
Once the bin is level and stable:
Set the head onto the bin carefully and secure it as intended, so vibration and day-to-day knocks do not shift it over time.
Route drains so they cannot kink when the unit is pushed back.
Leave enough clearance to clean behind and around the bin. Ice areas attract syrup spills, fruit bits and general bar grit.
Also watch airflow and heat rejection. Avoid boxing the unit in beside dishwashers, glasswashers, or hot gantries. Many “low output” complaints are really high ambient temperatures and poor ventilation.
5. Commission for hygiene, cube quality, and paperwork, not just “it makes ice”
Run the first cycles while you still have access to connections and can adjust positioning. Check for steady fill, clean drain-out and any sign of leaks. After a few harvests, confirm the bin area stays dry and odour-free.
Treat ice as a ready-to-eat food and build it into your HACCP routine, as outlined in FSAI HACCP guidance.
Before you hand it over, keep a simple setup and compliance log. It saves time later if there is an EHO visit, an insurance query after a leak, or a warranty discussion:
Installer, plumber and electrician details, plus commissioning date
Model IDs for the ice machine and bin, plus filtration parts fitted (SA30007, I40002-CN, SA950750 if used)
Water shut-off location and isolation method
Drain route and discharge point
Filter change plan and who owns it (operator, maintenance, contractor)
Cleaning and sanitising schedule for machine and bin, with sign-off lines
If you have not taken delivery yet, do a quick site walk for access (door widths and turns), service points and floor levels. It is an easy way to avoid an on-the-spot compromise that you end up living with during service.
Irish-Specific Considerations
Choosing a Unifrost ice machine, bin and water filter setup in Ireland is as much about local water conditions and inspection expectations as it is about the model. Geological Survey Ireland notes that groundwater hardness commonly comes from limestone dissolving into groundwater, which is exactly the kind of limescale pressure that shortens service intervals on ice kit and filters. The key point is variation: two sites a few kilometres apart can behave very differently once you start producing ice at volume.
Water hardness in Ireland: what it changes in your setup
Hard water is not a “nice to know” in Irish bars and cafés. It affects scale build-up in water circuits, cube quality, and how quickly filter cartridges and pre-filters load up.
Geological Survey Ireland has published a preliminary groundwater total hardness map for Irish groundwaters. If you are in a hard-water area, treat filter selection and cartridge-change planning as part of commissioning, not something to revisit after the first poor harvest or service call.
If your install uses the SA30007 complete kit with the I40002-CN main filter cartridge and SA950750 PP cotton pre-filter cartridges, hardness and sediment are typically the two practical drivers behind “which cartridge, how often”. If you see rapid limescale, pre-filter discolouration, or a drop in ice quality, assume a water condition issue first and work back from there.
Public supply vs private supply: don’t assume the same filter strategy
On a public supply, you can usually review credible, zone-based water quality history before commissioning. Uisce Éireann publishes drinking water quality results for each Water Supply Zone, which is useful for your site file and for sense-checking whether you need extra sediment protection ahead of the main filter.
On private supplies such as wells, group water schemes, or older properties with storage tanks, variability is the main risk. In practice that often means more flushing during commissioning, more frequent pre-filter changes, and a tighter routine for cleaning the bin, because there are more unknowns in the incoming water.
Food safety enforcement and what EHOs will care about
Ice is food. That changes how you maintain it and how you record what you are doing, particularly in pubs with high-volume service, hotels with multiple outlets pulling ice, or cafés using ice in blended drinks.
Ireland gives effect to EU food hygiene requirements through instruments including S.I. No. 369/2006 European Communities (Hygiene of Foodstuffs) Regulations 2006. In day-to-day terms, Environmental Health Officers tend to look for evidence that you control contamination risk across the full ice pathway: water in, ice out, bin storage, and staff handling.
Keep a small “ice system” section in your HACCP file with:
the Unifrost model(s) installed (for example U40-15, UB25-15, U165-125 or U230-175), the bin model (B175, B275AIB, B375) and the filter kit and cartridges fitted (SA30007, I40002-CN, SA950750)
the commissioning date, who installed it, and what was flushed and checked before first use
cleaning and sanitising records for the ice head and the bin interior, plus filter cartridge change dates
a note of where the water shut-off, filter head, and drain connections are located so staff can isolate the unit quickly
That is the difference between “we clean it” and “we can show it”, which is what matters during an inspection.
Registration and notification: especially relevant on new builds and takeovers
If you are opening a new venue or taking over a premises, notification and registration requirements sit alongside the equipment install. The HSE is clear that you must notify the HSE before you start operating a food business, and an Environmental Health Officer assesses the notification.
For ice equipment, this matters because early inspections often happen when you are busiest and still settling into routines. Having filter choices, flushing records and a bin-cleaning routine written down keeps the ice area from becoming the weak point.
Older Irish buildings: drainage, airflow, and service access are usually the pinch points
A lot of hospitality equipment in Ireland ends up in converted spaces: tight back bars, cramped prep areas, basements, or plant rooms that were never designed around modern ventilation and hygiene access. Your bin and filter setup needs enough space for cartridge changes and proper cleaning, plus a drain arrangement that stays reliable when service is flat out.
This becomes more critical when you are pairing modular heads such as U165-125 or U230-175 with separate bins like B175 or B375. If the unit is boxed into a corner with poor airflow or awkward drain runs, you can end up chasing symptoms like slow recovery, inconsistent ice, or water backing up during peak service even though the machine itself is fine.
Once you understand the Irish-specific risks, the next step is straightforward: do the site checks that prevent most early issues before the Unifrost ice machine, bin and filter arrive on site.
First-Week Checks and Adjustments
After installing a new Unifrost ice machine, bin and water filter, use the first week to confirm the basics are right before you start chasing “performance”. Get the unit level, make sure it can breathe, and prove the water and drain runs are sound. Run and discard the first batches of ice while you watch cube quality and cycle behaviour. If something looks off, change one thing at a time. Otherwise you will make the real cause harder to pin down.
1. Verify the basics: level, airflow, and steady running
In the first 24 hours, you are checking the install is mechanically sound.
Level matters. A slight twist can show up as odd noises, uneven freezing, or a bin door that never sits properly. Confirm both the head and bin are level.
Give it space to ventilate. A unit wedged into a tight void, pushed hard against a wall, or boxed in beside hot equipment will struggle, especially during service peaks.
Listen through a full freeze and harvest cycle. A new rattle is often a panel not seated after install, the unit touching a wall, or pipework vibrating against the cabinet.
If it’s a modular head on a separate bin (for example U165-125 or U230-175 on a B175 or B375), check the head is properly secured to the bin and not just “sitting” there under its own weight. Also check for metal-to-metal contact points that can transmit vibration.
2. Prove the water path: filter flush, flow, and leaks
If you have fitted the SA30007 filter kit (and where used, the SA950750 PP cotton pre-filter plus the I40002-CN main cartridge), make sure the filter is flushed and commissioned correctly before you judge taste, clarity or output.
In practical terms:
Run water through the filter to waste until it runs clear.
Re-check every push-fit and threaded joint, plus the isolation valve, for weeps under pressure.
For the first week, do a quick leak check daily, particularly after close when building water pressure can rise. If cube quality is poor but the refrigeration side sounds normal, treat restricted flow, a partially closed valve, or a kinked supply line as your first suspects before assuming a fault with the machine.
3. Watch drainage closely (it makes or breaks reliability)
A drain that is “connected” but not properly working is one of the quickest routes to early call-outs.
Confirm:
The drain run is continuously falling.
It is not rising over a threshold, sagging into an accidental trap, or terminating somewhere that can back up during a busy shift.
The site gulley can actually take the flow when there is meltwater and purge water, not just a trickle.
If the bin smells musty within the first week, it is often drainage or cleaning routine rather than ice production. If the premises has a history of slow gulleys or drain odours, treat the ice machine drain as a priority line, not “just another waste”.
4. Validate ice quality and bin behaviour during your real peak
Don’t judge output on a quiet morning. Check what happens when you are opening the bin constantly, such as a Friday night bar rush, functions, or a busy café lunch.
Focus on what you can see:
Are cubes forming consistently?
Is the ice coming out wet and clumping in the bin?
Is the bin level sensor or shut-off behaving sensibly, rather than overfilling or short-cycling?
If you have paired a head unit (such as U165-125 or U230-175) with a separate bin (B175, B275AIB, B375), agree with staff what “normal” fill looks like. That’s how you spot a production drop early, instead of discovering it mid-service.
5. Lock in hygiene and handling habits from day one
Ice is food. Treat the bin and scoop like any other food-contact area.
Set expectations immediately:
Decide where the scoop lives (not buried in ice).
Keep the lid closed and avoid hands in the bin.
Assign responsibility for end-of-night checks and basic cleaning.
Do not assume “brand new” means sanitised. If you document controls in your safety management system, note who owns water system checks and record keeping. Employers are expected to assess and manage water-system risks and keep records as part of Legionella control expectations, as set out in the Health and Safety Authority guidance on legionellosis risk management and record keeping. This is particularly relevant in hotels and larger premises where responsibilities are shared.
6. Troubleshoot early symptoms without creating new problems
If output is low in week one, check conditions before settings. Heat load and ventilation are common issues in Irish back-of-house areas where an ice machine ends up beside a glasswasher, under a low counter void, or in a tight store where warm air has nowhere to go.
If noise, slow harvest, or inconsistent ice appears after a few days rather than immediately, suspect a change on site first:
a bin lid not sitting right,
a blocked intake,
a drain starting to back up,
or a filter restricting flow as it catches initial debris.
Make one change, observe, and write it down. Those notes save time later, especially when you are comparing behaviour across sites or planning the next install.
Connecting to the Unifrost Ecosystem
Most Irish operators get the best long-term results from an ice machine by treating it as a supported system, not a standalone box. Consumables, cleaning intervals, and documented checks matter as much as the day-one install. Under Irish food hygiene law, you are expected to maintain procedures based on HACCP principles and be able to demonstrate control of risks in day-to-day operation, not just at commissioning, as set out in the European Communities (Hygiene of Foodstuffs) Regulations.
In practice, “support” is not just breakdown cover. It is having the right bin pairing, the right filtration parts on hand, and a simple record trail that stands up during an EHO visit or an insurance query.
Use Unifrost documentation like an ops tool, not a filing exercise
Your baseline is having the correct manual and exploded-parts reference for the exact unit on site, and having it where staff or your service partner can actually find it. It matters when you are troubleshooting low production after a filter change, a slow fill from a kinked line, or a bin level control issue. The right fix often depends on the specific configuration, not the brand name on the door.
Label documentation by what you have installed, for example:
Self-contained units such as U40-15 or UB25-15
Modular heads such as U165-125 or U230-175, paired with the correct bin (for example B175, B175OG, B275AIB, or B375/B375OG)
Water treatment parts, especially if you install the SA30007 complete kit and then replace I40002-CN cartridges and SA950750 pre-filter cartridges over time
Make parts replacement predictable (filters, pre-filters, bin wear items)
Decide at install stage what you will treat as standard consumables and keep on a shelf. With variable incoming water quality and busy Friday to Saturday peaks, the real cost of running out of filters is rarely the cartridge price. It is the disruption when output drops, cube quality changes, or scale builds up quickly.
For the Unifrost filter set-up referenced here, that usually means:
Standardising on the SA30007 kit where appropriate
Planning replacements around the I40002-CN main filter cartridge and SA950750 PP cotton pre-filter cartridges
If you run multiple machines, avoid “mystery filters” where nobody knows what fits. Put the cartridge code on the filter head and write the change date on the housing in marker so it survives staff turnover.
Keep a simple “ice system file” for EHO and insurance questions
You do not need a novel. You do need a one-page view of what is installed, what was changed, and when it was cleaned. Ice is effectively a ready-to-eat food, so inspections tend to focus on routine controls rather than occasional deep cleans.
Keep a file that is easy to access, either a folder in the office or a digital job sheet you can print. At minimum, record:
Exact model and configuration (for example U165-125 head with B175 bin)
Install date
Filter kit and cartridge codes (SA30007, I40002-CN, SA950750)
Location of the water isolator and electrical isolation point
A signed log for cleaning, sanitising, and filter changes
Know what’s an operator job vs what needs a competent installer
Day-to-day support is often straightforward: cleaning schedules, bin hygiene, replacing filter cartridges, and basic checks that the unit has adequate ventilation and airflow.
Where installations go wrong is when small plumbing shortcuts become operational problems, for example an undersized drain, poor fall on waste, shared waste lines that back up during peak service, or a filter installation that restricts flow.
As a rule, anything involving permanent plumbing changes, drainage rework, or tying an ice machine into an existing filtered-water manifold in a pub or hotel plant room is best handled by a competent installer. You are not only protecting the machine. You are protecting uptime, cube quality, and your ability to stand over the set-up if there is ever a complaint, leak, or call-out.
That mindset starts before the machine arrives on site, with a few checks that prevent most commissioning delays and the classic “we need to move it again” headache.
FAQs: Unifrost ice machine, bin and water filter setup checklist
What is the step-by-step installation checklist for new Unifrost ice machines, bins, and water filters in Irish hospitality sites?
Use this on day one so the machine makes hygienic ice quickly and you avoid the usual call-backs.
Before delivery: confirm access route and final location, allow space to service the unit, and ensure the floor/stand is level and strong enough for the machine and a full bin.
Verify services at the point of install: a dedicated power supply (to the data plate and manual), a cold potable water feed with an isolating valve, and a suitable drain route for the unit’s waste.
Choose the right location: keep the ice machine away from ovens, dishwashers, direct sunlight and any grease or steam sources. Make sure ventilation openings are not blocked.
Position and level the machine (and bin, if used): level is critical for consistent harvest and to prevent leaks. Re-check level after the unit has settled.
Fit the bin correctly (modular head setups): assemble the bin as per the Unifrost instructions, fit the correct interface parts, and secure the ice head to the bin before plumbing.
Plumb the water feed safely: fit an accessible shut-off valve, use food-grade hose/pipework, and avoid kinks. If your site requires it, fit appropriate backflow protection.
Install the filter kit: mount it where staff can reach it, keep it upright, and leave clearance below the housings for cartridge changes.
Flush and commission the filter: flush to a drain until the water runs clear, then connect to the ice machine. (New carbon cartridges often shed harmless black fines during the first flush.)
Connect the drain: keep the drain run simple, avoid “uphill” sections, and ensure there is no risk of dirty water backing up into the unit.
First start and hygiene: sanitise any parts that contact ice (bin interior, scoop, baffle/curtain if applicable), then start the machine and discard the first batch if recommended in the manual.
Functional checks: inspect for leaks, confirm proper water fill and drain, check that the bin switch (if fitted) stops production when the bin is full, and listen for unusual vibration.
Hand-over: label the filter with install date, show staff where the isolator and shut-off valve are, and put a cleaning and filter-change schedule into your HACCP folder.
How do I choose and install the right Unifrost water filter kit for a U40-15 or U230-175 ice machine?
Pick the kit based on your water conditions and your machine’s water demand, then install it so cartridge changes are quick and consistent.
1) Choosing the right Unifrost filter components
Start with the Unifrost complete kit (SA30007) as the typical “ready to fit” option for new installs.
Use the I40002-CN as the main filter cartridge replacement in that system.
Add or replace SA950750 PP cotton pre-filter cartridges where your site has visible sediment, older pipework, or you want extra protection for the main cartridge.
If you are unsure which cartridge combination to run on a U40-15 versus a higher-output machine like the U230-175, use this rule of thumb: the higher the daily ice demand and the harder your water, the more important it is to size the filtration correctly and keep spares on hand. Where there’s any doubt, match the final selection to the Unifrost documentation for your model or ask Unifrost support to confirm compatibility.
2) Installing it properly (applies to U40-15 and U230-175)
Mount location: on a solid wall or frame, close to the machine, protected from knocks, and with enough space below for cartridge removal.
Valving: fit an isolating valve before the filter, and ideally a second valve after it, so you can change cartridges without disrupting other equipment.
Direction of flow: follow the arrows on the housing and cartridge.
Flush before connection: flush the new cartridge(s) to a drain until water runs clear, then connect to the machine’s inlet.
Label and schedule: write the install date on the housing and set a recurring reminder for cartridge changes.
If the site already has a central filtration system, do not assume it is suitable for ice. Confirm it is food-safe, has adequate flow for the ice machine, and does not starve the unit during peak service.
How should Irish operators document their Unifrost ice machine, bin, and filter setup for insurance and inspections?
Keep a simple “ice system pack” that you can hand to an insurer, a maintenance contractor, or an Environmental Health Officer.
Include:
Asset register page: model names, serial numbers, install date, and location (e.g. “Bar 1 back counter”).
Photos: wide shot showing siting and ventilation clearance, close-ups of the data plate, plumbing connections, drain route, and the filter kit as installed.
Commissioning checklist: signed and dated, noting that the filter was flushed, drains tested, and leak checks completed.
Water treatment record: which Unifrost parts are fitted (e.g. SA30007, I40002-CN, SA950750), the cartridge change interval you follow, and a log of each change.
Cleaning and sanitising log: daily and weekly bin hygiene tasks (scoop stored correctly, lid closed, no glass stored in the bin) plus periodic deep clean dates.
HACCP reference: where “ice as a food” is covered in your food safety plan, including the control measures you use (filtration, cleaning schedule, staff training).
Service and call-out reports: keep all engineer notes and parts replaced; this is often what insurers want after a flood/leak claim.
A folder like this turns inspections into a quick review instead of a debate, and it helps you spot patterns such as repeated limescale-related issues or missed filter changes.
Next step: match the right Unifrost machine and accessories to your site
If you are planning a new install or upgrading an existing bar or kitchen, the easiest way to avoid sizing and compatibility mistakes is to choose the ice machine, bin, and filter setup together.
Browse Caterboss’s Ice Makers category to compare Unifrost options and the accessories typically fitted alongside them.
Keep comparing inside the same Unifrost topic
These articles are the best next reads if the visitor wants a deeper product choice, maintenance, or support route from here.
Unifrost Upright Freezer Temperature Controller Deep Dive Owner Hub
Explore Unifrost upright freezer controllers for optimal settings and food safety in Irish kitchens.
Read guide
Unifrost F410SS Upright Freezer Shelf and GN Pan Setup Guide for New Owners
Guide Irish kitchens in setting up and using shelves, GN pans, and baskets in the Unifrost F410SS upright freezer efficiently.
Read guide
Unifrost F410SS Upright Freezer Upgrade or Replacement Guide
Explore when to replace or upgrade your Unifrost F410SS upright freezer for optimal performance in Irish kitchens.
Read guideView Unifrost bottle coolers at Caterboss
The article stays useful on its own, but when the reader is ready to compare real products or move into a commercial conversation, this is the clean next step.