
Unifrost Upright Freezer Temperature Controller: New Owner Core Overview Guide for Irish Kitchens
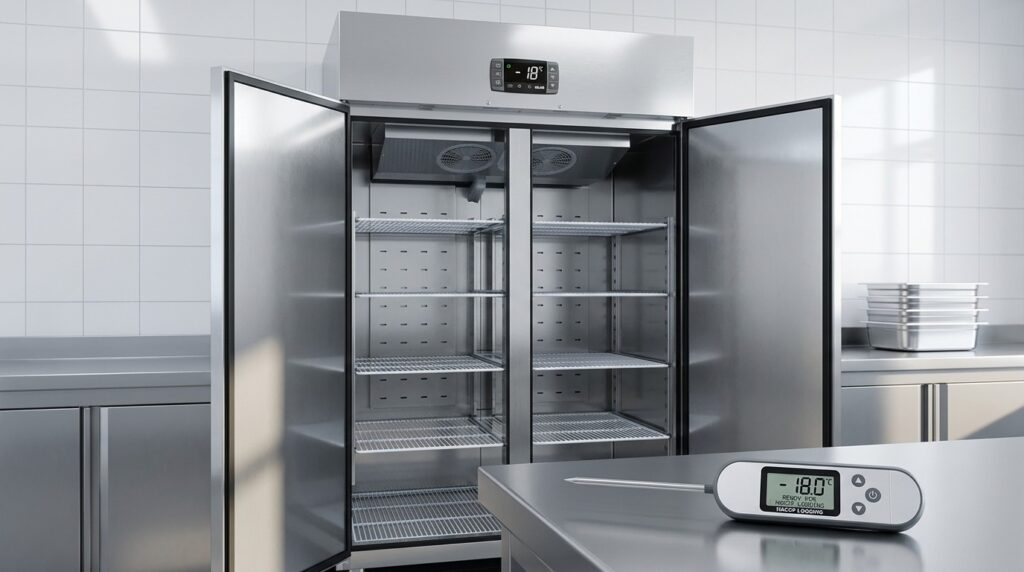
Learn to set up and manage Unifrost upright freezer controllers for Irish kitchens. Essential guide for safety and efficiency.
Unifrost Upright Freezer Temperature Controller Guide for New Owners in Irish Kitchens
You rely on your Unifrost upright freezer controller to protect stock, pass HACCP checks, and avoid costly callouts, but only if it is set up and interpreted correctly. This guide is written for new owners and operators using Unifrost upright models commonly found in Ireland, including F410SS and F1000SV family cabinets, where the front-fascia digital controller manages setpoint, defrost, and alarms.
You will learn the practical day-one checks after delivery and install, a no-regret freezer setpoint range to start from, and how to tell what the display is actually showing (setpoint vs cabinet temperature vs defrost state). You will also work through the real tradeoffs that matter in a busy kitchen: how tight to run temperature versus energy use and door discipline, what “dEF” and high or low alarms usually mean, how to cross-check with an independent thermometer for HACCP logging, and which settings should stay locked down for managers or engineers only.
Why Unifrost Upright Freezer Controllers Matter in Irish Kitchens
A properly set controller is what keeps frozen food consistently at a safe storage temperature, even with doors opening all day and a warm kitchen around it. That matters because Irish food safety guidance expects frozen food to be stored at -18°C or colder, and your HACCP checks need to show you are controlling that risk (see FSAI guidance on storing food safely).
The key point is this: the number on the display is only part of the story. Defrost cycles, probe position, loading, and ambient heat can all cause short-term swings. If you do not understand what “normal” looks like on your controller, it is easy to log false issues, or miss a real one.
Why “close enough” temperatures create real commercial risk
A freezer running a bit warm is not just a compliance headache. It can shorten product life through freezer burn and texture damage, and the cost shows up later when you pull stock during service.
On the flip side, running colder than you need can push up electricity use. It can also trigger nuisance alarms if the alarm limits and defrost routine are not set to suit how the freezer is used on your site.
Why the controller links HACCP checks to what the cabinet is actually doing
Most upright commercial freezers use a front digital controller with a setpoint, alarms, and an automatic defrost routine. That controller is what your team sees during AM and PM checks, so it needs to be understood and used consistently.
Make sure staff know the difference between:
Setpoint (target temperature): what the cabinet is trying to achieve
Cabinet reading: what the probe is measuring at that moment
Defrost behaviour: a planned cycle where temperatures can rise temporarily without meaning the freezer is “failing”
If your HACCP routine does not match what the controller is showing, you end up with inconsistent logs, unnecessary call-outs, and staff who start ignoring alarms because they expect them to be “nothing”.
Why day-to-day habits often matter more than the controller itself
In a busy Irish kitchen, most “temperature problems” start with workflow, not electronics. It helps to separate controllable habits from genuine faults:
Doors held open during prep: the freezer is constantly recovering, and the probe will see it.
Overfilling or blocking airflow: stock packed tight to the back or fan area makes temperatures uneven and slows pull-down.
Warm product going straight in: it drags the cabinet temperature up and can trip alarms.
Dirty condenser from flour or grease: heat rejection drops, run time increases, and the unit can struggle in warm kitchens.
Predictable defrost messages or flashing temperatures: often normal, but staff should understand what they mean so a real high-temperature alarm is not brushed off later.
Once the controller, alarm limits, and staff checks are aligned with how the freezer is used day to day, you get fewer surprises, cleaner HACCP records, and more reliable frozen storage.
Key Steps for Setting Up Your Unifrost Upright Freezer Controller
Start by identifying the exact controller on the front fascia and downloading the matching manual from the Unifrost Manuals & Downloads hub before you change anything. Then do your day-one installation checks, let the cabinet pull down to temperature empty, and set a sensible working setpoint that gives you a buffer for busy service. Finally, cross-check the controller reading with an independent thermometer and agree who is allowed to change settings. In practice, most “temperature problems” come down to access, loading, airflow and door habits rather than the controller itself.
1. Identify the controller and get the correct manual before changing settings
Unifrost upright freezers in Irish commercial kitchens can be supplied with front-fascia digital controllers from common families such as Dixell, Elitech or Carel. The button sequences and parameter codes vary by controller type, even when the display looks similar, so avoid following generic “Dixell XR” steps from a random video.
Check the controller face for a model/code (and, if needed, behind the fascia), then download the matching PDF from the Unifrost Manuals & Downloads hub. Use the controller code, not just the freezer model. If you cannot identify it confidently, treat it as read-only for now and focus on the physical setup and temperature verification steps below.
2. Do day-one delivery and installation checks before you load stock
Before you touch setpoints, make sure the freezer is installed in a way that lets it perform properly. A lot of early issues are site-related, especially in tight kitchens and warm service areas.
Check the unit is level and stable, the door self-closes, and the gasket seals cleanly all the way round with no shipping damage.
Confirm you have the ventilation clearances your manual specifies, and that the intake and exhaust are not boxed in by shelving, bins or stored stock.
Power it on and let it pull down to temperature empty before loading. Cooling the cabinet and the product at the same time slows pull-down and muddies fault-finding.
Identify the plug or isolator and label it. Accidental unplugging is common in busy prep areas.
Once it has stabilised, open and close the door a few times and watch recovery. If recovery is poor on day one, it is usually placement, airflow or sealing rather than the setpoint.
If the cabinet was transported on its side, follow the supplier guidance on how long to leave it standing before switching on. Powering up too soon can create symptoms that look like a control fault.
3. Set a practical setpoint that suits Irish HACCP expectations and real service conditions
Your goal is stable, safe product temperature with enough buffer for normal door openings, deliveries and busy service.
The Food Safety Authority of Ireland notes that food that is still frozen can remain frozen as long as the temperature is below -18°C in a freezer, including during disruption events (FSAI guidance).
A sensible working setpoint many operators use is around -20°C to -22°C, provided the unit can hold it without running flat-out. Where you land depends on the site:
Hot line / frequent door openings: a slightly colder setpoint can give useful buffer.
Cool store / low traffic: you can often run a touch warmer to reduce run time, as long as product stays safely frozen.
Use the controller manual to change the setpoint properly, then leave it alone for a full operating cycle so you can judge stability.
4. Confirm what the display is actually showing before you rely on it for HACCP checks
Controllers can be configured to show different values: probe temperature, a “displayed” cabinet temperature, or the setpoint. The display may also behave differently during defrost. For HACCP, you want the team logging a consistent and meaningful number.
Cross-check with an independent thermometer in a consistent location once the cabinet has been stable for a while. Use a calibrated probe where possible. If the readings do not match, do not jump straight to changing offsets unless the manual covers it and you are recording what you changed and why. First confirm:
you are not mid-defrost,
you are not measuring beside the door or in the direct airflow path,
you have not just loaded warm product.
5. Set up defrost and alarms so they help, not hinder
On many upright freezers, a “dEF” message or defrost icon is often a normal cycle rather than a fault. The practical check is whether the cabinet returns to normal temperature afterwards and whether product stays hard-frozen.
Use the correct controller manual to confirm:
what “dEF” means on your controller,
typical defrost duration for your configuration,
which alarms are active (high temp, low temp, probe errors) and what the alarm delay is.
In a busy kitchen, brief door openings can spike cabinet air temperature quickly. Alarm delays should be long enough to avoid nuisance alarms, but short enough to catch genuine issues such as a door left ajar. If the solution you are leaning towards is disabling alarms, treat it as a workflow or loading issue to fix, not something to mask at the controller.
6. Control access and hand over a simple routine to staff
A common early mistake is letting everyone change settings during the first week. Decide, in writing, who can change the setpoint (typically a manager or head chef), who can acknowledge alarms, and what is engineer-only (defrost settings, probe offsets, compressor protection parameters and anything you do not fully understand).
Keep training practical: give staff a five-minute “controller map” for your site. Cover what the normal screen reading represents, how to recognise defrost, and what to do when an alarm appears. In multi-shift kitchens, agree an AM/PM check that includes:
is it in defrost,
are doors sealing properly,
is the display plausible,
is airflow around the unit clear.
Once the basics are consistent, it becomes much easier to diagnose why a freezer will not pull down or hold temperature without guessing.
Common Controller Setup Mistakes and How to Avoid Them
Most “controller problems” on Unifrost upright freezers (including the F410SS/F620SV/F1000SV/F1300SV/F1310SV families) come down to setup and day-to-day use. The usual culprits are chasing the number on the display, changing parameters without the correct controller manual, or mistaking normal defrost behaviour for a fault.
This matters for HACCP. You need consistent monitoring and a clear corrective-action routine when temperature control isn’t achieved. If the controller settings get muddled, you end up with nuisance alarms, confusing records, and unnecessary risk. Also, the controller can look “wrong” when stock is fine, or look “fine” while product is warming, depending on probe location, loading, and door openings.
Mistake 1: Chasing the display number instead of checking product temperature
In a busy kitchen, it’s common to adjust the setpoint because the cabinet “looks warm” after a delivery, a restock, or a run of door openings. Then it gets left there.
The key point: the display is typically showing air temperature at the probe, not the warmest point in the cabinet and not the product core temperature. Air reacts quickly to doors opening, warm items going in, and disrupted airflow, so it will swing more than your stock does.
What this looks like in practice:
Raising the setpoint to stop alarms instead of fixing the cause (door discipline, loading, airflow, dirty condenser).
Dropping the setpoint “to be safe”, then paying for it with longer run time, icing, and slower recovery after doors open.
Recording the setpoint for HACCP rather than recording a measured temperature and a trend.
Overpacking shelves or blocking the back wall, which prevents airflow returning to the evaporator and makes temperature control uneven.
Treating a quick glance as a check rather than verifying routinely with a calibrated thermometer.
A sensible approach is to agree one site setpoint, restrict changes to trained staff, and make it clear that the display is a prompt to check, not the final word.
Mistake 2: Changing defrost and alarm parameters without the right controller manual
Unifrost uprights use digital controllers mounted on the front fascia. The button sequences and parameter names vary between controller types, so guessing your way through menus is a quick route to trouble. Seemingly minor changes, such as alarm delays, defrost intervals, probe offsets, or compressor minimum off-time, can create warm spells, nuisance alarms, or excessive ice.
Common “it won’t hold temperature” scenarios that are self-inflicted include:
The cabinet being left in manual defrost.
Defrost frequency being changed to suit a short spell of hot kitchen conditions, then never put back.
A probe offset being applied to “make the display match” instead of addressing probe condition, placement, or airflow.
If you don’t have the exact controller manual from the Unifrost Manuals and Downloads hub, treat anything beyond checking the setpoint and obvious alarm states as a manager or engineer task. If parameters are changed, record what was changed and why in your HACCP file. It saves a lot of head-scratching after a power cut or a service visit.
Mistake 3: Treating normal defrost behaviour as a fault, or treating a fault as “just defrost”
A “dEF” indication or a flashing temperature can be normal during a defrost cycle. The problem is when it becomes a pattern: long defrosts, poor pull-down after defrost, or repeated high-temperature alarms once the cycle finishes.
Decide in advance what staff should do during service:
Acknowledge the alarm.
Keep door openings to a minimum.
Recheck after an agreed time window.
Don’t start changing parameters mid-shift.
For HACCP, what matters is monitoring, verification, and corrective action when control is lost, not a perfectly steady display. The FSAI’s HACCP guidance is clear that monitoring and corrective actions must be part of your system and records (see the FSAI Principles of HACCP, monitoring and corrective actions/principles-of-haccp)).
If alarms keep returning after defrost, stop writing it off as “normal dEF” and check what affects recovery first: door seals, loading and airflow, condenser cleanliness, and whether the unit is operating in a hotter location than expected.
These are the common reasons it’s worth standardising how your site checks, adjusts, and documents controller settings before you get into the step-by-step day-one setup and staff handover.
Interpreting Unifrost Controller Displays and Alarms
A controller display is the front-panel readout on your upright freezer. Most of the time it shows cabinet air temperature. At other times it will show a status (like defrost) or an alarm code.
The important bit in day-to-day use is this: the same code can mean different things depending on the controller brand and how it is set up. If you are troubleshooting, match what you see to the correct manual from the Unifrost Manuals & Downloads hub rather than relying on a “standard” list from another model.
Setpoint vs actual cabinet temperature (and what to record for HACCP)
On most upright freezers, the normal display is the actual cabinet air temperature, not the setpoint. Expect it to move during service, after loading, and during defrost. That movement does not automatically mean your stock is at risk.
For HACCP, focus on a consistent, defensible routine rather than reacting to every short-lived spike on the screen. Take readings at the same time each day, using the same method, and follow up if the unit does not recover.
The FSAI guidance is that freezers should be maintained at -18°C or colder for frozen storage (FSAI temperature control guidance). Many operators set a slightly colder working temperature to allow for door openings and recovery, but the key test is whether the freezer reliably holds frozen product at safe temperatures in your actual service conditions.
What “dEF” means, and when it’s normal
“dEF” generally indicates the freezer is in a defrost cycle. During defrost, it is normal for the displayed air temperature to rise for a period and then drop back once refrigeration restarts. The most common operator mistake is intervening mid-cycle by switching the unit off or changing settings, which often causes a longer warm-up than the defrost would have.
Treat “dEF” as routine if:
it clears by itself, and
the cabinet temperature returns to your normal running range afterwards.
Treat it as a problem worth investigating if:
“dEF” appears to run for an unusually long time,
it repeats very frequently, or
it is followed by repeated high temperature alarms.
In practice, that points to things like restricted airflow (ice or over-packing), a door seal not closing cleanly, high ambient temperature around the unit, blocked condenser airflow, or settings that no longer suit the location.
Common alarms you’ll actually see in service, and what to do first
HI / High temperature alarm: The cabinet has been warm for long enough to breach an alarm limit. Common causes are loading, heavy door openings, or an underlying cooling issue. Keep the door shut, check for blocked airflow and dust around the condenser area, and verify with an independent probe before making any call on stock.
LO / Low temperature alarm: Less common, but it can happen after setpoint or parameter changes. It is usually a cost and product-quality issue (unnecessary over-freezing) rather than an immediate food safety incident. Confirm the setpoint and that no one has changed the differential/settings.
Flashing temperature: Often means an alarm condition, a defrost-related display mode, or a reading outside a configured range. Don’t assume the controller is wrong. Check the actual cabinet and product condition.
Probe / sensor error: The controller cannot rely on its temperature sensor. Treat this as urgent because you have lost reliable monitoring. If you cannot confirm temperatures independently, move high-risk stock to a known-good freezer.
dEF: Defrost in progress. If it lands during your HACCP check, note it and re-check later to confirm recovery rather than changing settings.
If an alarm follows a power cut, deal with the temperatures first, not the buzzer. The FSAI guidance is to check temperatures and discard any meat, fish or dairy that has fully defrosted, while food still frozen can remain frozen if it stayed below -18°C (FSAI power outage guidance).
Why the controller can look “fine” while the freezer isn’t (and vice versa)
A controller only reports what its probe reads, and that probe measures air at one point in the cabinet. In a working kitchen, that can differ from product temperature, especially after loading or during busy door openings. You can also get the opposite problem: the display looks acceptable, but product softens because airflow is blocked by over-stocking, the door is being held open, or ice has built up around the evaporator.
When something looks off, use a quick three-part check:
Controller reading
Independent thermometer/probe
Product condition (hard frozen, no sweating, no signs of thaw and refreeze)
That approach stops staff “fixing” the wrong thing and helps you decide whether it’s a normal operating cycle, a loading issue, or a genuine fault that needs attention.
Optimising Freezer Efficiency in Busy Irish Kitchens
Run your Unifrost upright freezer efficiently by setting a sensible target temperature, then protecting it with good loading, airflow and door habits. Keep the heat-rejection side (vents and condenser area) clean and clear. Treat defrost behaviour and alarms as early warnings, not background noise. For HACCP, cross-check the display temperature with a separate thermometer, and only change advanced parameters when you’re sure which controller you have and what the setting actually affects.
1. Set a practical target temperature and verify it with checks
In day-to-day hospitality use, you’re better off aiming for stable, safe storage than chasing the coldest possible number. The Food Safety Authority of Ireland notes frozen food can continue to be kept frozen when it remains below -18°C in its business guidance on disruption events (see FSAI advice for food businesses).
In most Irish kitchens, a workable approach is a controller setpoint around -20°C to -22°C, then use your logs and verification checks to confirm the cabinet and product are staying at or below -18°C during real service conditions (frequent openings, warm deliveries, busy prep). The “right” setpoint depends on location, opening frequency and whether you’re holding high-risk stock or simply backup.
2. Load for airflow and recovery, not just capacity
Upright freezers struggle when they’re packed tight to the back like a suitcase. You need cold air to circulate and you need the evaporator and fan area inside the cabinet to breathe. Otherwise the display can look fine while corners and top shelves drift warmer after a busy service.
Keep it simple for staff: leave a visible gap at the back and don’t block any internal vents or fan guards with boxes, trays or liners. If you regularly bring in warmer stock, batch it and spread it. A single heavy load drives long run times and slows pull-down after door openings.
3. Manage door openings as part of service flow
In a café, pub or hotel kitchen, the freezer can end up being used like a drawer. Every door opening pulls in warm, moist air, which increases compressor run time and adds frost load ahead of the next defrost.
Build a “one-open” habit during rush periods: plan your grab, open once, take what you need, close fully. If people are repeatedly opening the door just to check stock, that’s usually a layout or labelling problem. Moving high-turn items to the most accessible shelves can cut door time without touching any settings.
4. Treat ice build-up as an efficiency problem first
A defrost message on the display can be normal. The issue is heavy ice build-up or long, frequent defrost activity, which increases running costs and reduces performance. Ice on internal panels, fans, or around the door frame is often a sign of warm air getting in, for example a door not closing cleanly, a damaged gasket, or the door being held open during decanting.
If defrost is disrupting you at peak times, fix workflow first: decant away from the open door, stop door wedging, and check the door closes squarely every time. If you still suspect settings, identify the exact controller type before making changes. Defrost timing and defrost type vary by controller, and “quick tweaks” can create bigger problems if you’re in the wrong menu.
5. Keep the condenser side clean and give the unit space
A lot of “not holding temperature” issues in Irish kitchens come down to heat and dirt rather than the controller. When the condenser and airflow path are clogged with flour dust, grease or lint, the freezer runs longer and struggles at busy times.
Use a repeatable check your team can own:
Keep front and rear ventilation paths clear of boxes, kegs and packaging.
Put condenser cleaning on a schedule that matches your kitchen. Monthly is reasonable in greasy or flour-heavy environments.
If the freezer sits beside a grill, near a dishwasher outlet, or in direct sun through a window, expect higher run times and more temperature swing unless you relocate it or improve ventilation.
6. Use HACCP checks to spot drift early
The display temperature is useful, but it isn’t the same as product temperature. It can also be influenced by defrost state and probe location. Build a routine of cross-checking with an independent thermometer and logging both readings. That gives you early warning of performance drift, not just day-to-day cycling.
If logs show the cabinet is borderline at the same times each day, that usually points to operations (door openings, loading) or site conditions (ambient heat), not a sudden refrigerant fault. Knowing the difference reduces unnecessary call-outs and avoids the common mistake of “fixing” it by overcooling and paying for it on the meter.
7. After a power cut, stabilise before you restart normal use
Power interruptions happen, and the risky moment is the restart and restock rush. When power returns, keep the door closed, let the freezer pull down properly, and confirm temperatures before treating stock as back in safe storage. If anything has defrosted, handle it under your site’s food safety decision process. The FSAI notes food can continue to be kept frozen when it remains below -18°C in its disruption guidance (see FSAI advice for food businesses).
Once these day-to-day habits are in place, you’re in a better position to decide which controller settings should be left for managers or engineers, and which can be safely used by staff.
Integrating Controller Management with HACCP Practices
Aligning your upright freezer controller with HACCP is mostly about consistency. Pick a clear frozen-storage target, set the controller so normal day-to-day operation stays inside that target, and log temperatures in a way that makes sense during a busy Irish service. Then back it up with periodic checks using an independent thermometer, and control who can change settings.
1. Set a HACCP target temperature and your site limits
Your HACCP plan needs a target and a clear limit that staff can follow without overthinking it. For frozen storage, the baseline expectation is -18°C or colder, as reflected in FSAI guidance on temperature control and chilled and frozen storage.
In real kitchens, many operators set the freezer below -18°C (often around -20°C to -22°C) to allow for door openings, stock loading, and warmer ambients without drifting out of spec. The right “buffer” depends on use:
High-traffic service freezer near the line or pass: allow more headroom.
Backup freezer in a cooler store: you can often run closer to the limit without nuisance alarms.
2. Set up the controller so the display supports HACCP checks
For HACCP, your team needs to recognise three different things a controller may show during a shift:
Setpoint: what you asked the unit to run at.
Cabinet/probe temperature: what the controller thinks is happening right now.
Operating state: especially defrost, when the displayed temperature can rise temporarily.
Set alarm thresholds so they support your HACCP limit without creating constant false alarms. A common mistake is setting the high temperature alarm too close to the setpoint, so normal recovery after loading or door openings looks like an “incident”. If alarms cry wolf, staff stop taking them seriously.
3. Use a logging routine that works on a busy shift
Your temperature log should read clearly to a manager, an auditor, or a relief chef. At minimum, record:
Time
Displayed cabinet temperature
Whether the unit is in defrost (a mid-defrost reading can look like a failure when it is not)
Pick one approach and stick with it across all shifts:
Log the controller cabinet temperature at set times (e.g. open and close), or
Log an independent thermometer reading from a fixed location in the cabinet
Where sites get caught out is mixing methods and then arguing about which reading “counts” when something goes wrong.
4. Cross-check the controller with an independent thermometer
A controller display is not automatically a calibrated measurement, and probes can be bumped, iced up, or drift over time. Build in a routine cross-check (weekly or as suits your HACCP plan) where a manager or nominated person compares:
controller probe reading, versus
an independent thermometer placed consistently (not in the door pocket, not beside the fan outlet, not buried in newly loaded product)
Record the result and any action taken. If there is a repeatable gap, treat it as a settings or maintenance issue rather than a staff issue. Typical causes include probe positioning, icing, airflow restrictions, or defrost performance.
If you need to review parameters, use the correct controller manual for the controller fitted to your unit (do not guess settings across different controller families).
5. Define corrective actions for alarms and defrost, and restrict access
HACCP is as much about your response as your numbers. Write simple, workable corrective actions for common situations, for example:
Check the door is closing properly and seals are intact.
Confirm stock is not blocking airflow inside the cabinet.
Avoid loading large amounts of warm product at peak times where possible.
If the unit cannot recover within your agreed timeframe, escalate to service and record what was done.
Finally, control access. Setpoint, alarm thresholds, and defrost parameters should be manager-controlled or engineer-controlled, and any change should be recorded in your HACCP file with date, reason, and name. That prevents well-meaning staff from “fixing” alarms by widening limits, or masking a performance issue by changing the setpoint to something the unit cannot hold in your actual site conditions.
Once your targets, logging method, and permissions are agreed, controller setup becomes straightforward and staff training is much easier to keep consistent.
Next Steps: Continuous Management and Staff Training
Most upright freezer controller issues come back to people and process, not “mystery faults”. The safest approach is to treat controller checks, record keeping, and change control as part of your food safety management system, in line with FSAI guidance on HACCP-based food safety management. What varies between Irish sites is service pressure, who has access to the controls, and whether the freezer is on the pass or in back-up storage. Your training needs to match that reality.
A simple handover that stops button-twiddling
From day one, set clear expectations. Staff should know how to read the display and recognise normal operation, but they should not be changing settings mid-service.
Do a short handover at the freezer using the manual for your specific controller and model from the Unifrost Manuals & Downloads hub. Then set a simple rule: anything beyond reading the temperature, checking the setpoint, or acknowledging an alarm is manager-approved.
Teach a 5-minute “controller map” (what the display is actually telling you)
Give new starters a shared way to describe what they see. They need to separate:
Current cabinet temperature (what the probe is reading right now)
Setpoint (the target temperature)
Operating state (for example defrost, which can temporarily make the display look “off” without meaning product is unsafe)
That distinction reduces false call-outs, avoids unnecessary unloading, and keeps HACCP notes consistent between shifts.
Decide who can change what, then write it down
If everyone can alter parameters, you will eventually end up with drifting performance, nuisance alarms, or stock risk after a well-meant “fix”.
A workable split in most kitchens is:
Staff: acknowledge alarms and report what they see
Supervisors: adjust the setpoint only, and only within an agreed band
Manager or engineer: anything involving defrost scheduling, probe parameters, alarm delays, calibration, or protected settings
When a change is made, record what changed, who authorised it, why it was needed, and what “normal” should look like afterwards. That stops the next shift guessing.
Build controller checks into the shift rhythm (AM/PM) so logs are reliable
HACCP checks only help if people read the controller the same way and check at roughly comparable times. A short routine done consistently beats occasional deep-dives, especially where teams rotate.
Check and record: controller reading, door fully closing, obvious ice build-up, and whether the unit is in defrost or showing an active alarm.
Cross-check at an agreed frequency with an independent thermometer positioned properly (not on the door, not against the evaporator cover). Log “controller vs thermometer” so you can spot drift early.
If readings are borderline, re-check after a sensible recovery window with the door kept shut, rather than chasing the setpoint during service.
Use alarms as an action trigger, not background noise
Train staff on exactly what you expect when they see a high temperature alarm, a probe error, or a defrost indication. You are trying to avoid two common failures: ignoring alarms because they happen too often, or overreacting by moving stock without evidence.
Your procedure should be specific: who gets told, what gets checked first (door discipline, loading, airflow, and condenser cleanliness if it is safe to access), what gets recorded, and when to escalate to service support.
After an Irish power cut: a fast “back in control” check
Power interruptions and brownouts cause confusion because the freezer can restart with alarms and still need time to pull down after warm air has been let in.
The training message is simple: do not assume it is fine because it powered back on, and do not start changing settings to force recovery. Confirm the controller is running normally, check for active alarms, keep the door shut, and only return higher-risk stock to normal use once you have a stable reading and a documented check that matches your HACCP routine.
If you move the freezer, re-brief the team
Relocating a unit from a cool store to a hot service line changes performance immediately. A move closer to cooklines, dishwash areas, or tight joinery usually means higher ambient heat, poorer airflow, and more door openings.
Treat the move like a mini handover. Remind staff that door-open time and loading patterns now matter more, explain that longer pull-down and more frequent cycling can be normal in hotter conditions, and agree what would count as a fault versus expected behaviour in the new position.
Make a one-page quick-reference card that matches your site
A printed card inside a nearby cupboard door will get used more than a PDF. Keep it tight:
What “normal” looks like on your controller
Your agreed setpoint band
What to do when “dEF” or an alarm appears
Who is allowed to change settings
Where the correct manual is stored for your exact Unifrost upright model
That makes good practice repeatable, even when the team changes.
Frequently asked questions
What temperature should my commercial upright freezer be set to for safe frozen food storage in Ireland?
For day to day frozen storage, a practical target is to keep product at or below -18°C.
In real Irish kitchen use, many operators set the controller setpoint a little colder (often around -20°C to -22°C) to create a buffer for door openings, busy service, and defrost cycles. The exact “best” setpoint depends on how hard the unit is working (location, loading, door discipline), so confirm using an independent thermometer (see HACCP checks) and adjust in small steps.
How do I change or check the temperature setpoint on a Unifrost upright freezer’s digital controller?
Unifrost upright freezers commonly use front fascia digital controllers (often Dixell, Elitech or Carel families, including XR02CX type layouts). Because the button sequence can vary by controller family, use this safe, non destructive approach:
Check the setpoint without changing anything: on many controllers you can press SET once to display the setpoint briefly, then it returns to the current cabinet reading.
Change the setpoint (if unlocked): commonly you hold SET for a few seconds until the setpoint value flashes, use the ▲/▼ arrows to adjust, then press SET again (or wait a few seconds) to save.
If you cannot adjust it: the keypad may be locked, or changes may be restricted to managers or engineers.
If your controller does not match the above, don’t guess. Match the controller model (printed on the fascia or inside the control box) and follow the correct PDF from the Unifrost Manuals & Downloads hub so you do not accidentally alter defrost or alarm parameters.
Why is my upright freezer not reaching or maintaining the set temperature?
Work through these quick checks first, as most “not cold enough” calls are site or usage related rather than a failed controller:
Give it time after delivery or a deep defrost: allow the cabinet to pull down fully before loading stock.
Loading and airflow: avoid loading warm product, overfilling shelves, or blocking internal air channels. Leave space around the back wall and fan outlets.
Door discipline and seals: check the door is closing cleanly, the gasket is intact, and nothing is preventing a full seal.
Condenser cleanliness: if the condenser is dusty or greasy, performance drops fast. Clean it safely (power off first) and keep a regular schedule.
Room conditions: very hot kitchens, tight alcoves, or poor ventilation around the unit can stop it holding temperature.
Defrost state and icing: heavy ice build up on the evaporator area can indicate a defrost, door, or usage problem.
If the display shows repeated alarms, the unit is running continuously without pulling down, or you suspect a probe or refrigeration fault, stop loading high risk stock and arrange service. When you call, note the model, the display message, and whether the temperature issue is constant or mainly during service.
Next step: choose the right freezer (or sanity check your setup)
If you are comparing sizes, door types, or deciding whether an upright is the right fit for your kitchen workflow, it helps to browse the current options first and then narrow down by real site constraints like ventilation, loading pattern, and HACCP logging.
You can explore Caterboss’s Frozen Storage category to compare upright freezers alongside other frozen storage formats, then come back to Unifrost.ie for controller and setup guidance once you have a shortlist.
Related Unifrost guides
Compare models, maintenance advice and support information related to this topic.
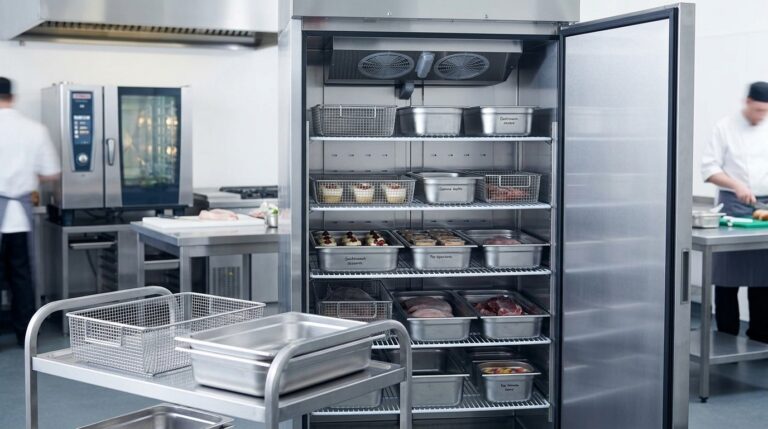
Optimizing GN Basket Plans for Unifrost F410SS Upright Freezer in Hotel Banqueting
Explore GN basket planning in the Unifrost F410SS for Irish hotels. Optimize layouts for efficiency in banqueting.
Read guide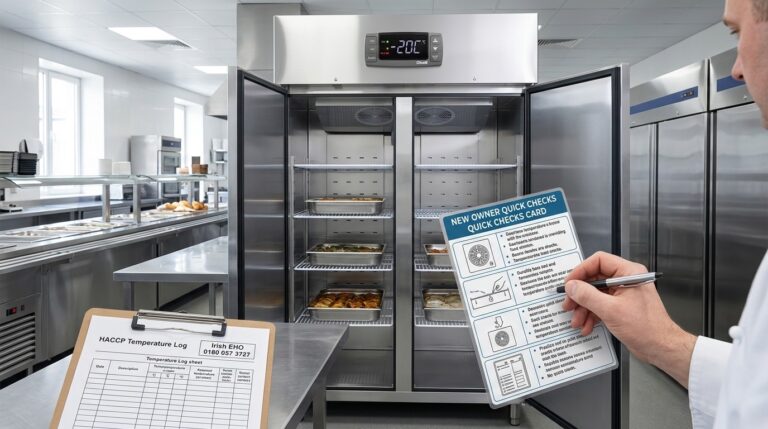
New Owner Quick Checks for Unifrost Upright Freezer Temperature Controllers
Quick reference for setting and checking Unifrost upright freezer controllers in Irish hotel service lines.
Read guide
Unifrost F410SS Upright Freezer Use Cases in Irish Kitchen Settings
Explore ideal Unifrost F410SS freezer use cases in Irish kitchens. Boost reliability, reduce waste, fit menu needs. Compliant with HACCP.
Read guideCompare Unifrost freezer options on Caterboss
For current product options, pricing and availability, continue to Caterboss.