
Unifrost Upright Freezer Temperature Controller: New Owner Quick Checks Guide
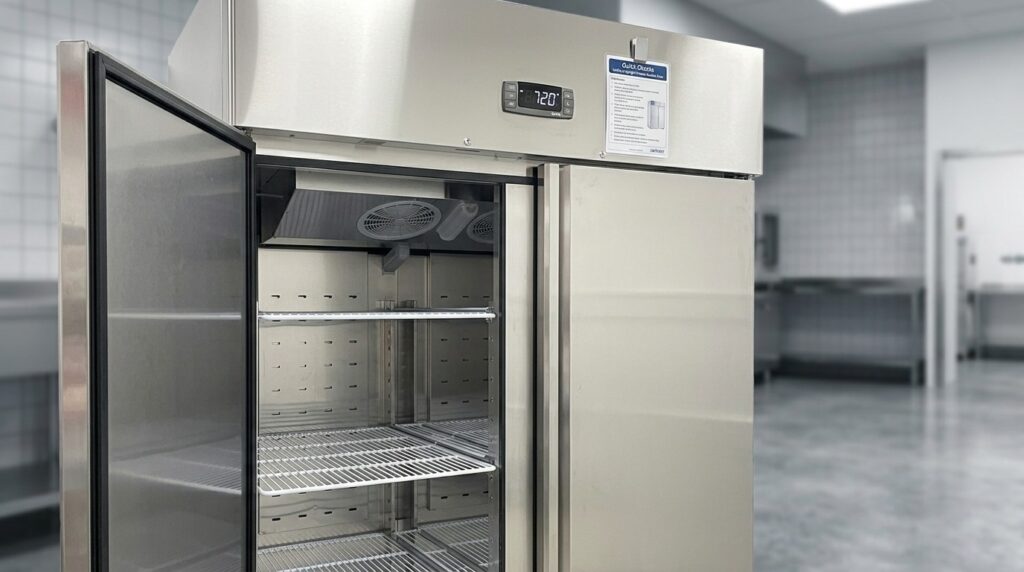
Essential quick checks for new Unifrost upright freezer owners in Ireland to ensure optimal temperature control.
Unifrost Upright Freezer Temperature Controller: New Owner Quick Checks (Ireland)
If you have just taken delivery of a Unifrost upright freezer in Ireland, the temperature controller is what turns “it’s running” into “it’s safe, stable, and cost-controlled”. A wrong setpoint, a misread display, poor airflow, or an ignored alarm can leave you with unsafe stock, wasted energy, and messy HACCP records.
This guide walks you through the practical first-day checks you should do on Unifrost upright models such as the F1000SV, F1300SVN, F1310SV, F410SS, and F620SV. You will learn how to confirm the controller is actually controlling, how to set and verify a sensible freezer set temperature, what the main buttons and symbols typically do, and what to check before you call support for a “not cold enough” issue.
You will also build a one-page quick checks card for beside the freezer that standardises your setpoint, logging routine, and alarm responses across staff and shifts, with clear tradeoffs between food safety expectations, pull-down time after installation, and day-to-day running costs.
Welcome to Your Unifrost Upright Freezer
Unifrost upright freezers supplied in Ireland include models such as the F1000SV, F1300SVN, F1310SV, F410SS, and F620SV. The digital temperature controller is the part you will use most, because it’s where you set the operating temperature, check alarms, and see what the cabinet sensor is reporting.
From a food safety point of view, the practical goal is simple: keep stock properly frozen. The FSAI notes that food can remain frozen as long as it stays below -18ºC in a disruption scenario, which is a useful reference point when you’re setting alarm limits and deciding what to check during an incident (FSAI guidance). Just remember the display is a sensor reading, not proof that every item in the cabinet is at that temperature. You still need routine checks and logging as part of your HACCP.
Models you will commonly see on Irish sites
You’ll often come across these model references in Irish kitchens, back-of-house stores, and retail prep areas:
F1000SV
F1300SVN
F1310SV
F410SS
F620SV
Why the controller matters in daily trading
The controller is effectively the freezer’s control centre. It decides when the system runs, when it defrosts, and when it throws an alarm. That has knock-on effects you’ll notice quickly:
Pull-down after loading, for example after a delivery
Recovery after door openings, especially in busy prep
Ice build-up and defrost performance, which affects usable space and cleaning time
How early you spot a fault, before stock is put at risk
If the setpoint, alarm limits, or defrost settings don’t suit how you actually use the freezer, you can end up with nuisance alarms, heavier frost, and longer runtimes. That’s common enough in real kitchens, for example a café freezer that’s opened constantly during prep, or a takeaway loading warm(ish) product too quickly after a peak.
Your first admin job: match the controller to the right manual
Before you change anything, identify the controller and match it to the correct manual. Unifrost provides controller manuals and support PDFs (for example XR02CX) via the Manuals & Downloads hub on unifrost.ie. This matters because button sequences, parameter names, and symbols can vary between controller families, even when the display looks similar.
Once you know which controller you have and what the display is showing, you’re in a solid position to set sensible alarms and do your first checks before the next service shift.
Initial Temperature Controller Setup and Checks
Start by identifying the temperature controller fitted to your Unifrost upright freezer, then use the correct manual for that controller. Set a sensible frozen-storage setpoint, allow time for pull-down and stabilisation, and confirm the cabinet reading with a calibrated probe before you rely on it for service. If temperatures are off, sort airflow, loading and door-seal issues first, then look at controller settings.
1. Confirm the controller label and get the right PDF before changing settings
On Unifrost upright freezers (for example F1000SV, F1300SVN, F1310SV, F410SS, F620SV), the cabinet model code does not always tell you which controller is fitted. The controller label on the fascia does.
Check the controller name printed on the front (for example XR02CX), then download the matching PDF from the Unifrost Manuals & Downloads hub. Button sequences and menu layouts vary by controller, and using the wrong sequence is how setpoints get changed without anyone noticing.
2. Do the first power-up checks that affect temperature performance
Before you judge any temperature reading, make sure the freezer is installed in a way that lets it reject heat properly.
Confirm it’s level and stable.
Make sure the door closes cleanly and the gasket isn’t folded, torn, or obstructed.
Leave enough space around the cabinet for airflow so the condenser can shed heat.
If the unit is tight into a corner or beside a hot pass, fryer line or dishwasher, expect slower pull-down and nuisance alarms. That often looks like a “controller issue”, but it is usually an airflow and ambient heat problem.
3. Set a frozen storage setpoint that makes sense for food safety
For general frozen food storage, aim to keep product at -18°C or colder. The FSAI notes that freezers in food businesses should be maintained at -18°C or colder.
Source: https://www.fsai.ie/business-advice/running-a-food-business/caterers/temperature-control
Many kitchens set slightly colder than -18°C to give a buffer during busy periods when doors are opened frequently. Use the standard setpoint change method shown in the manual for your controller.
On day one, avoid changing parameters like differential, probe offset/calibration, defrost settings, or alarm delays unless you are working from the correct PDF and you are addressing a specific fault or symptom.
4. Let the freezer pull down and stabilise before you rely on the display
A new install needs time to settle, especially if it has been transported, stood in a warm area, or had the door open while shelves and stock are being organised. The controller display is useful, but it is still a sensor reading at one point in the cabinet, not a guarantee that everything inside is at temperature.
Once the unit is cycling normally (not running flat-out continuously), verify using a calibrated probe thermometer. For frozen foods where you cannot probe the core, the FSAI advises measuring between packs.
Source: https://www.fsai.ie/business-advice/running-a-food-business/caterers/temperature-control
If the probe and display disagree consistently, check loading (don’t block air paths), door sealing, and airflow before assuming the controller is wrong.
5. Set up day-one HACCP monitoring and a simple “quick checks” card
Your HACCP monitoring should be easy to do consistently. The FSAI notes monitoring should be simple, clear and easy to do, and that frequency depends on the size and nature of the business.
Source: https://www.fsai.ie/business-advice/running-a-food-business/food-safety-management-system-(haccp)/principles-of-haccp
Decide:
Who checks the freezer.
When it’s checked (for example, opening and closing checks).
What action to take if it’s outside limits.
A one-page laminated card beside the freezer helps staff move quickly:
Target: -18°C or colder, and where to see it on the display.
Daily checks: display reading, door fully shut, excessive ice build-up, fans sound normal, stock not blocking vents.
If warm alarm: keep the door closed, stop loading warm stock, move high-risk items to another freezer if available, and flag it to the manager.
If a probe/alarm code appears: write down the exact code/message before power-cycling, then check the controller manual.
Also label the circuit breaker and the location of the temperature log. It saves time the first time someone trips a breaker during a busy shift.
6. Standardise settings across multiple upright freezers
If you run more than one upright freezer, standardise the basics: setpoint target, check times, and alarm response steps. It reduces training load and helps you spot when one cabinet is drifting warmer than the rest.
Once the unit is stable and you’ve a consistent log routine, troubleshooting gets faster because you can separate genuine refrigeration faults from day-to-day operating issues.
Understanding Temperature Controller Features
Most Unifrost upright freezer controllers are straightforward once you treat them as “setpoint plus alarms”, rather than a mystery box. For food safety, the baseline expectation is that freezers in food businesses are maintained at -18°C or colder, as set out in the FSAI temperature control guidance for food businesses.
One practical complication is that the same cabinet can arrive with different controller makes (commonly Dixell, Elitech, or Carel). The layout looks familiar, but the button sequence and icons can change slightly. If you want certainty, work from the controller model on the fascia, not the freezer model on the data plate.
Common buttons and what they usually do (Dixell-style and similar)
Most controllers give you a small set of “operator-safe” keys, plus icons that show what the cabinet is doing. Labels vary, but these are the functions your team will use day-to-day:
SET: Shows the setpoint (target temperature). Usually the key you hold to edit it.
▲ / ▼: Adjusts values while editing the setpoint or scrolling basic menus.
Standby (often a circle with a line, or an ON/OFF key): Puts the controller into standby. If the display shows OFF, refrigeration is not actively running even though the unit still has power.
Defrost (often a snowflake/water symbol, or a DEF key): Triggers or acknowledges defrost on some controllers. Many cabinets also run scheduled defrosts automatically.
Alarm mute (bell icon, or a silence key): Silences the buzzer, but does not resolve the cause of the alarm.
Snowflake icon: Cooling demand or compressor activity on many controller families.
Fan icon: Fan running indicator where supported.
Bell or triangle icon: An alarm condition exists (temperature alarm, probe fault, door-open alarm, depending on setup).
dEF / DEF on the display: A defrost cycle is in progress. Cooling pauses temporarily and the cabinet should recover afterwards.
If the controller has a clear model label (for example XR02CX), use that to match the correct PDF before taking the icons as gospel. Unifrost keep controller manuals and parameter guides in the Manuals & Downloads hub. It is the quickest way to get the right button map for the controller you actually have on site.
How to adjust the set temperature (setpoint) safely
For most operators, the only “owner-safe” change is the setpoint. On many controllers the sequence is:
Press SET briefly to view the setpoint.
Press and hold SET until the value flashes.
Adjust with ▲/▼.
Press SET again to confirm.
If the keypad is locked (often shown with a padlock icon), you will need to follow the unlock sequence in the matched manual.
Two points matter in real kitchens:
Setpoint is not product temperature. The controller reads an air probe, not the core temperature of the food.
Change in small steps, then wait. Give the freezer time to settle through a normal trading cycle before deciding the change “worked” or “did nothing”.
What the display temperature really represents (and why it swings)
Avoid judging performance based on the display right after heavy door opening. Every time the door opens, warm moist air rushes in and the probe sees that quickly. The display can climb even when stock is still hard frozen.
If you need to verify product conditions for HACCP, use a separate probe thermometer and check in a consistent way (for example between packs, or using a controlled “simulant” pack). For day-to-day confidence, consistent checks at consistent times (pre-service and post-service) beat chasing the lowest number on the screen.
Alarms, faults, and when the controller is giving you a real warning
A high temperature alarm (often HI, a bell icon, or a flashing temperature) means the probe has been above the alarm threshold for long enough to trigger an event. That can be a genuine issue, but it is also common during initial pull-down or after loading a large delivery.
A probe fault alarm is different. If you see an error that points to the sensor (often “P1”-style messages on some controllers), treat it as a reliability issue rather than an operating one. Even with a sensible setpoint, the cabinet can behave unpredictably if the controller cannot trust its probe. This is where the correct controller manual matters, before you start changing settings or power-cycling the unit.
Finding the exact controller manual (XR02CX and others)
Don’t identify the controller by cabinet model alone. Unifrost upright freezers in Ireland include models such as F1000SV, F1300SVN, F1310SV, F410SS, and F620SV, and controller type can vary by batch and configuration. The practical method is:
Read the controller model from the fascia.
Download the matching controller PDF (for example the Dixell XR02CX manual) from the Unifrost.ie manuals library.
With the right manual to hand, you can do the first checks that reduce nuisance alarms and avoidable call-outs when you are in the middle of service.
Maintaining Food Safety with Proper Temperature Settings
Proper freezer temperature settings matter because the controller setpoint is what keeps food reliably frozen during real service. Think door openings, hot kitchens, deliveries being put away quickly, and heavy loading after prep. In Ireland, the Food Safety Authority of Ireland (FSAI) is clear: freezers should be maintained at -18°C or colder. Set your Unifrost controller with that target in mind, and verify the unit can actually hold it in your kitchen conditions, not just on a quiet morning (FSAI temperature control guidance for caterers).
One important detail: the number on the display is typically a cabinet sensor reading. It is useful day-to-day, but it is not the same as a product temperature check. You should confirm actual temperature (core where practical, or between packs for frozen/vac-packed items) during commissioning, on hot days, and after heavy loading.
What setpoint should you use on a Unifrost upright freezer to meet FSAI expectations?
Your goal is simple: food stays at -18°C or colder, consistently. That means choosing a setpoint that allows for the reality of service, rather than aiming for a perfect number on the screen.
The FSAI requirement is about the maintained temperature, not the value you type into the controller. If the controller is set to “-18” but stock is regularly sitting closer to “-16” during busy periods, you are outside the intended storage standard (FSAI guidance).
If you run more than one upright freezer, standardise how you set them up, including:
the setpoint you expect
what your team does when an alarm triggers
when you verify with a probe
Then confirm each cabinet can maintain temperature in its actual position. Two identical freezers can perform very differently if one is beside a combi oven or in a tight, warm corner, while another is in a cool storeroom with light traffic.
How do Unifrost controller readings tie back to HACCP checks in Ireland?
Treat the controller display as a quick operational check, not your only proof. For HACCP records, use a calibrated probe thermometer when you need evidence that food is held at temperature. The FSAI recommends using a calibrated probe thermometer, recording the measured temperature, and notes probe accuracy should be at least ±0.5°C (FSAI temperature checking guidance).
For audits, consistency is what keeps you out of trouble:
record at the frequency your HACCP plan specifies
take readings the same way each time (core where possible, or between packs)
make sure staff understand the difference between “the controller looks fine” and “we have a logged, verified temperature”
How do temperature settings affect running costs without drifting outside safe storage?
Running colder than you need generally increases compressor run time and electricity use. But trying to save money by running warmer is a false economy if it pushes you above safe maintained frozen storage.
Use the FSAI benchmark as your non-negotiable line: -18°C or colder. Real cost control usually comes from the basics:
correct installation and ventilation (don’t box the unit in)
not placing it beside heat sources
loading that keeps airflow clear
door discipline during service
Unifrost controllers help by making temperature control repeatable. Once you have a sensible setpoint and alarms configured, day-to-day management becomes simpler: respond to alarms, watch for door issues, and keep on top of defrost behaviour, rather than constantly changing settings.
If you need the exact button sequence or parameter meanings for your controller (for example XR02CX), use the correct PDF from the Unifrost.ie Manuals and Downloads hub before changing anything. Then carry out first-day checks so the freezer stabilises properly before it goes into full service.
Quick Start Checks for New Owners
On delivery and first power-up, focus on three things: damage, placement, and temperature performance. Check the cabinet and door seal before you sign, make sure it’s level with clear airflow, then let it pull down properly before you load stock. Finally, cross-check the controller display with a probe thermometer, because air temperature at the sensor and product temperature are not always the same on day one.
1. Inspect the freezer on delivery (before you sign)
Do a quick but picky check while the driver is still there. Cosmetic knocks are common enough, but you’re really looking for anything that could affect hygiene, the door seal, or cooling performance.
Check outer panels, door, hinges and the controller area for dents, cracks or impact marks.
Open the door and inspect the inner liner.
Run your hand around the gasket: look for tears, twists, gaps, or sections not sitting flat.
If something is off, note it immediately before accepting the delivery.
2. Confirm the location works (ventilation, clearance, ambient heat)
An upright freezer has to dump heat from the condenser. If it’s squeezed into a tight bay, placed beside a combi oven, or left in sun in a servery, it will run longer, use more power, and recover more slowly after door openings.
Use this placement check:
Keep air inlets/outlets clear and do not block grilles.
Avoid heat sources (ovens, fryers, dishwashers) and warm draughts.
Leave practical clearance so warm air can escape and you can clean behind the unit.
If the space is likely to be hot in summer, treat that as a planning issue now, not after the first busy weekend.
3. Level the cabinet so the door closes properly
A freezer that isn’t level often looks like it has “temperature problems”, when the real issue is the door not sealing consistently. Levelling helps the door close reliably and compresses the gasket evenly.
A simple check: open the door slightly and let it go. If it doesn’t close cleanly, adjust the feet until it does.
4. Power-up checks before you load stock
Once positioned, plug it into its dedicated supply and switch it on. On first start, don’t start changing settings until you know what controller is fitted and you have the correct instructions, as button sequences vary.
While it’s running empty:
Listen for rattles or vibration (often a loose panel or something touching a fan guard).
Check for repeated alarms or warning beeps.
Confirm it sounds and behaves like it’s running normally before you commit stock.
5. Let it pull down, then verify with a probe (not just the display)
Don’t load product straight away. Let the cabinet stabilise first, then confirm it’s actually holding a safe frozen storage temperature.
In Irish food businesses, the practical target is -18°C or colder, in line with FSAI temperature control guidance: https://www.fsai.ie/business-advice/running-a-food-business/caterers/temperature-control
To verify performance, use a calibrated probe thermometer placed between packs (or in a suitable test pack) and compare it to the controller display once temperatures have settled.
If the cabinet won’t pull down when empty, or the probe and display are significantly different, stop there and troubleshoot before filling it. That saves you time, stock, and a lot of avoidable call-outs later.
Alarm Settings and Responses
If your Unifrost upright freezer throws an alarm, don’t ignore it. The quickest way to lose frozen stock is a slow temperature drift you only notice when product starts to soften, ice crystals form, or packaging sweats.
In Ireland, -18°C is a key reference point for frozen storage in day-to-day food safety checks. A brief alarm after loading or busy service is common. A persistent alarm with the door shut is different. That usually points to airflow, loading, a door seal issue, or a refrigeration fault.
Common controller alarms, and the fastest first response
High temperature alarm:
The cabinet temperature has risen above the alarm threshold. Close the door, stop loading, and check that air vents and internal airflow aren’t blocked by boxes or overfilled shelves. With the door kept shut, you should see the temperature trending down again over the next 30 to 60 minutes. If it stays high or continues to rise, treat it as a live issue.
Door open alarm (where fitted):
The door has been left open or isn’t sealing properly. Shut it firmly, then check the gasket for splits, debris, or ice. Also check nothing is physically holding the door off the frame (basket, shelf lip, overhanging cartons).
Probe fault / probe error:
The controller isn’t reading the temperature probe correctly. The freezer may still be running, but you cannot rely on the display for HACCP records. Keep the door shut, avoid moving stock unnecessarily, and take a manual product temperature check while you arrange service.
Defrost-related warnings:
The unit may be in defrost, or struggling to complete it. Don’t chip ice with tools. Instead, check for obvious ice build-up around air outlets and make sure the door is closing cleanly. Moist air from a poor seal is a common cause of heavy icing and repeat alarms.
High-temperature alarms: what “urgent” looks like on a busy shift
A high-temperature alarm matters most when it is sustained and unexplained, not when it follows a delivery or a period of heavy door openings. If the display stays high and does not trend down with the door closed, treat it as a food safety incident. Start noting what happened (loading, door left open, power interruption), what the display shows, and what actions you took.
The FSAI uses -18°C as a practical reference point for frozen food remaining properly frozen, which helps you judge whether you are dealing with disruption or potential disposal. See the FSAI guidance here: FSAI advice on freezer temperatures during disruption.
Probe fault alarms: why resetting isn’t a fix
If the probe is faulty or disconnected, a reset may clear the alarm briefly, but it does not restore a trustworthy temperature reading. That puts you at risk of recording inaccurate temperatures and missing a real warming event.
Use a second measurement you trust, ideally a calibrated probe thermometer checking product packs, not just air near the door. If you need to confirm what an alarm code means or how it resets, use the correct controller manual for your unit via Unifrost’s Manuals and Downloads hub, as alarm behaviour varies by controller type.
Before you call support: three checks that save time
You will usually get a faster diagnosis if you can separate a true temperature problem from a controller-reading problem:
What does the display show right now, and is it rising or falling with the door shut?
Does the alarm return immediately after you acknowledge it?
Does the cabinet feel cold, and do your manual checks agree with the display?
Being able to report “high-temp alarm persists with door closed and it isn’t pulling down” versus “probe error but product is still hard frozen” gives support something concrete to work with.
Routine Monitoring for Optimal Operation
The quickest way to avoid stock loss in an upright freezer is to make basic checks part of shift start, not something you only do when there’s a problem. The Food Safety Authority of Ireland (FSAI) advises frozen food should be kept at -18°C or colder. If a freezer is drifting warm, that becomes both a product-quality issue and a HACCP risk.
Also, don’t rely on the display alone. A controller can show a neat number while restricted airflow, a tired door seal, or ice build-up is quietly dragging performance down, especially in busy kitchens with constant door openings.
Daily visual checks that catch most problems early
Do these at the start of each shift and after heavy loading. Those are the times an upright freezer is under the most pressure, and small issues show up fast.
Controller display and alarms: Check the reading is steady and there are no alarm symbols. A temperature that keeps bouncing is often down to frequent door openings, warm stock being loaded, or poor airflow, not necessarily a fault.
Door close and gasket condition: Open and close the door deliberately once. You want a clean latch and a continuous seal all the way around. Split, greasy, or torn gaskets at the corners let warm air in, which means longer run times, faster icing, and slower pull-down after service.
Airflow inside the cabinet: Make sure nothing is jammed against the back wall or fan cover, and that shelves aren’t packed so tightly that air can’t circulate. Upright freezers live or die by airflow. “Packed full” can quickly become “warm spots”.
Fan noise and air movement: With the door open briefly, you should normally hear the fan and feel some air movement. A new rattle, a change in tone, or silence is worth dealing with early.
Ice and frost build-up: A light, even frost can be normal depending on use. Heavy ice around air outlets, on the evaporator cover area, or along the door frame usually points to warm air ingress or doors being held open. It’s not cosmetic. Ice restricts airflow and reduces cooling capacity.
Spillages and loose packaging: Cardboard, cling film, and labels end up blocking vents and sticking to fan guards. A quick tidy prevents a lot of “not cold enough” call-outs later.
What to record for HACCP, and what to verify in practice
Your HACCP sheet should include routine temperature checks, but it helps to separate what the controller says from what the food is experiencing. If you’re hearing “ice cream is soft” or noticing product thawing at edges, verify with a calibrated probe placed between packs (or a product-simulator bottle if you use one) and compare that to the controller reading.
This matters most in high-turnover Irish sites like cafés, takeaways, and hotel kitchens during breakfast and prep. Door openings and warm load-ins can push air temperature up quickly even when the freezer is healthy. What you’re looking for is a sensible recovery back to a stable holding temperature after the rush, not a perfectly flat line all day.
Quick actions before you call support about “not cold enough”
If the freezer isn’t recovering, start with the causes you can fix in minutes:
Check the door is closing fully and not being held open by a box corner or an overhanging shelf load.
Make sure vents and the fan area aren’t blocked by stock or packaging.
Look for unusual ice patterns that suggest air leakage or heavy door-open time.
If those are all fine, confirm the controller settings and what the key symbols actually do. It’s common for a unit to be left in an unexpected mode after cleaning or a busy delivery, and you’ll save time by ruling that out before escalating.
Building a Quick Checks Card for Your Freezer
A one-page “quick checks” card beside the freezer helps keep temperatures steady and stops well-meaning staff from random button pressing during service or handovers. It also gives you a simple reference point when something looks off.
The Food Safety Authority of Ireland (FSAI) guidance is clear: freezers in food businesses should be kept at -18°C or colder. That gives you a straightforward “target line” for the card (FSAI temperature control guidance). The key detail to spell out is that the controller display is not the same as product temperature. Your card should tell staff when the display is enough, and when to verify with a probe.
What to include on the one-page card (keep it specific to your unit)
Aim the card at what someone can do in the first 30 seconds. Keep it tied to what’s in front of them: the cabinet, the controller, the setpoint, and a short “if this happens, do that” list.
Use this checklist, and keep it to one page:
Freezer ID and location (for example: “Freezer 1, Main Kitchen Pass”), plus the serial number from the rating plate. This matters when you’re logging issues or booking a call-out.
Controller label as printed on the fascia and where to get the correct manual. Point staff to the Unifrost manual hub rather than guessing settings from a similar-looking controller: Unifrost Manuals & Downloads.
Agreed operating setpoint in plain language (for example: “Normal setpoint: -18°C”), aligned to FSAI freezer guidance (FSAI temperature control guidance).
Display vs product rule (one line) (for example: “If the display rises above -18°C, verify product temperature with a probe between packs before moving stock”).
HACCP logging reminder (for example: “Check and record temperatures as per HACCP and keep records for inspection”), in line with FSAI’s expectation to check, record, and retain temperature records (FSAI safe food handling guidance).
Escalation path: who to tell first on shift, and what details to capture before anyone unplugs or switches anything off.
For busy kitchens, make it easy to use: large font, laminated, and fixed at eye level beside the controller. Avoid sticking it on the door. It will get soaked, torn, or disappear during cleaning and deliveries.
How to write the “quick checks” so they catch problems early
Write the checks around repeatable moments: opening, and shift change. That’s when you catch slow problems early, before you lose stock.
Keep the checks “visual first”:
Door fully shut and not being held off by a tray, carton, or overhanging packaging.
Door seal sitting flat with no obvious gaps.
Controller display stable (not climbing fast after a busy loading period).
No unusual ice build-up that suggests the door has been left ajar.
If you see repeated light frosting, steer staff towards the usual cause first: stock or packaging preventing a proper door close. Don’t let the default assumption be “the controller is wrong”.
For loading, keep it blunt: don’t pack product tight against air outlets or the back wall where airflow needs to circulate. Even with a correct setpoint, restricted airflow leads to the classic complaint: “it’s set right but it’s warm”.
The HACCP bits that belong on the card (without turning it into a training manual)
Two lines is usually enough, as long as they point to the right standard. FSAI guidance supports a practical approach: keep the freezer at -18°C or colder, and check temperatures with a calibrated probe thermometer as part of your HACCP plan, recording what you measured (FSAI temperature control guidance).
If you use the Safe Catering Pack paperwork, add the exact form name on the card so staff don’t improvise during an inspection. FSAI publishes a refrigeration temperature recording form as part of the pack (FSAI Safe Catering Pack record books). It’s a small detail that can save time and hassle on the day.
A simple alarm and “not cold enough” script before you call support
Build a minimum info set into the card before anyone rings your service company:
What the display says now
What it was at the last check
Whether the door was left open
Whether the unit has been loaded with warm stock
Whether there’s visible ice build-up
Add one clear instruction: take a photo of the display (and any alarm code) before switching anything off. Power-cycling can wipe the context you need for diagnosis.
Keep alarm guidance controller-specific. Instead of guessing codes, use wording like: “If an alarm shows, photograph the code and refer to the manual for this exact controller label”, then route them to: Unifrost Manuals & Downloads.
Standardising cards across multiple Unifrost uprights on the same site
If you have multiple uprights, standardise what you can:
Same setpoint wording across the site
Same logging reminder
Same escalation contact and info to capture
But don’t assume the same button sequence across controllers. A workable approach is to keep the top half of every card identical, and vary only the controller label and the manual link line so nobody follows XR02CX instructions on a different controller family.
Once the card is in place, it also becomes your baseline for setup checks: confirm the controller label, confirm the setpoint, and confirm the freezer is holding temperature before it’s put under full service pressure.
Tying it back to the Unifrost support ecosystem
What you do with a freezer controller depends on two things: the controller fitted to the unit and your own HACCP routine. Treat the controller as a documented control point, not just “a number on a screen”.
For Irish food businesses, the FSAI notes that frozen food remains safe to keep frozen while it stays below -18°C. That is a useful yardstick when you are sanity-checking performance during real incidents like a power cut or a door left ajar (FSAI guidance for food businesses). The practical point is that your settings, alarms and display readings should match your site checks, logs and escalation steps, especially when different staff use the unit across shifts.
Finding the right controller manual quickly (and why it matters)
Across Unifrost upright freezers, the “change setpoint” steps can vary by controller family. Don’t guess button combinations mid-service.
Use the Unifrost.ie Manuals and Downloads hub to pull the correct controller PDF for the exact unit you have on site. If you have common controllers such as XR02CX, keep a saved copy in your site HACCP folder so it’s there during an EHO visit or when the Wi‑Fi drops.
This manual-first habit also prevents accidental changes. A lot of “not cold enough” issues come back to basics: a setpoint nudged during cleaning, a defrost parameter changed unintentionally, or an alarm muted without fixing the cause.
Keeping your HACCP temperature records aligned with what the controller is telling you
A controller display is useful for day-to-day trend checking, but it is not the same as a verified product temperature.
Your HACCP plan should spell out what you monitor, how often you check it, and what corrective action you take when you are out of limit. The FSAI is clear that monitoring and frequency depend on the nature and size of the business, but it should be simple and recorded (FSAI HACCP principles/principles-of-haccp)).
In most Irish kitchens, the workable approach is:
Log the controller reading at defined times (for example, start of day and mid-shift).
Use a probe to verify when something looks off, after a delivery, or after a suspected door event.
Record the corrective action when you’re outside your critical limits.
If you are audited, that gives you a clear story: controller checks for trend, probe checks for confirmation, and actions taken when limits are breached.
Before you call support: simple checks and the information that speeds up diagnosis
If you need help from Caterboss, you’ll get a faster answer if you can describe the fault in the same terms as the controller manual and the unit’s normal behaviour.
A one-page “quick checks” card beside the freezer helps staff respond consistently. When you escalate, include:
The unit model (for example F1000SV or F620SV) and any controller reference on the bezel or label (for example XR02CX)
Current display temperature, set temperature, and any alarm code or probe fault symbol
When it started and what changed (delivery, cleaning, restock, power cut, hotter-than-normal kitchen conditions)
What you’ve already checked (door closure and gaskets, obvious ice build-up, blocked internal air paths, condenser area not clogged with dust where accessible)
A recent probe check result, and where it was taken (centre of load is more useful than “near the door”)
Labelling also makes a difference. If the controller, isolator/breaker and temperature log sheet are clearly labelled, any staff member can act quickly, which matters on a busy Friday and during an inspection.
Standardising settings across multiple Unifrost uprights on one site
If you run several uprights in a hotel kitchen, café group or production setup, standardising setpoints and alarm responses reduces training time and prevents “mystery alarms” being ignored.
The goal isn’t to force every unit into identical settings regardless of location. A freezer beside a combi oven will behave differently to one in a cooler back store. The goal is consistent expectations:
The setpoint you use as your site standard
Which alarms are treated as urgent
The first-response steps staff take before stock is at risk
With that structure in place, the controller becomes easier to manage because your team isn’t reinventing the process on day one.
FAQs: Unifrost upright freezer controllers (Ireland)
How do I adjust the set temperature on a Unifrost upright freezer controller?
Most Unifrost uprights use a standard digital controller workflow, but the exact button sequence varies by controller model.
Practical, safe approach:
Identify the controller model first (it’s usually printed on the fascia or label, e.g. XR02CX).
Check whether the display is showing cabinet temperature or setpoint. If you’re not sure, don’t guess.
Use the controller’s setpoint (SET) function and arrow keys (where fitted) to change the setpoint, then confirm/save as the manual specifies.
If your controller doesn’t have obvious SET/arrow keys, or it’s locked, download the exact manual for your controller and follow the setpoint steps for that model. That avoids accidentally changing alarm limits or defrost parameters.
What temperature should a commercial upright freezer run at for food safety?
For Irish food operations, the practical target is:
Setpoint: typically -18°C for frozen storage.
Working tolerance: brief rises during door openings are normal, but the freezer should recover back to the setpoint reliably.
Two useful checks for food safety and inspections:
Measure product, not just air: verify with a calibrated probe between packs or in a test pack, because the controller usually reads air temperature at the cabinet probe.
Log consistently: record temperatures at the same time(s) each day and note unusual events (delivery loading, power outage, doors left ajar) so your HACCP record tells the full story.
How do I quickly confirm my Unifrost upright freezer is installed in a suitable location?
Use this fast “new owner” location check before you blame the controller or refrigeration system:
Ventilation: make sure the unit isn’t boxed in. Leave clear airflow around the grille/air inlets and outlets and don’t stack cartons against the sides or back.
Ambient heat: keep it away from ovens, fryers, dishwashers, direct sun, or hot pass areas. Excess ambient heat is a common cause of slow pull-down and high-temperature alarms.
Level and stable: the cabinet should sit level so doors close properly and seals seat evenly.
Door closure: confirm the door self-closes and seals all the way around. A quick paper test at multiple points can reveal weak seal contact.
Power supply: ensure it’s on a dedicated, stable supply and not sharing an overloaded circuit with high-draw equipment.
If any of these are off, fix them first. Many “not holding temperature” calls are resolved by improving airflow, reducing heat load, or correcting door seal issues.
Next step: download the exact controller manual (for your model)
If you’re new to the unit, the quickest way to avoid wrong settings is to work from the exact controller PDF for your freezer (for example XR02CX). It will show the correct steps for changing the setpoint, understanding icons/alarms, and performing safe basic troubleshooting.
Use Unifrost’s manuals hub to find and download the matching file for your controller and keep a copy beside the freezer as part of your “quick checks card” pack.
Related Unifrost guides
Compare models, maintenance advice and support information related to this topic.
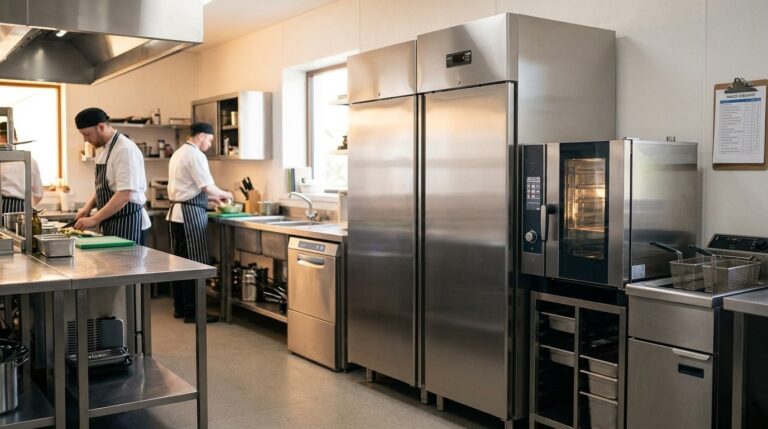
Unifrost F410SS Upright Freezer in Hot Kitchens: Ventilation & Troubleshooting Guide
Optimize your Unifrost F410SS upright freezer in hot Irish kitchens. Learn about ventilation, GN layout, and troubleshooting.
Read guide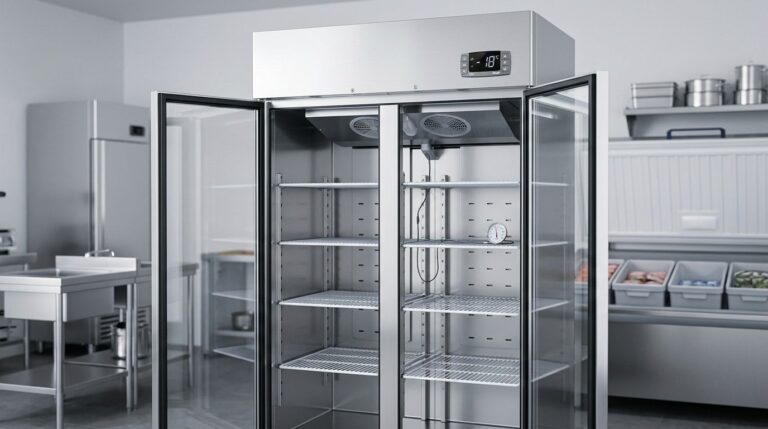
Unifrost Upright Fridge Freezer Temperature Controller: Owner Basics Guide
Discover how to manage Unifrost temperature controllers effectively for optimal fridge and freezer performance in Irish kitchens.
Read guide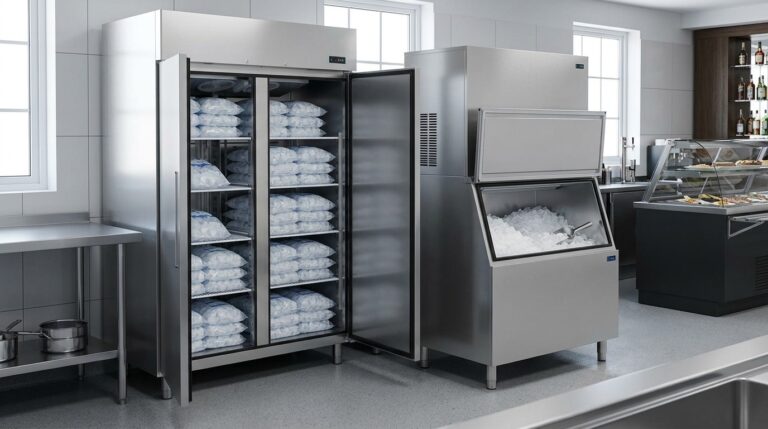
Unifrost Upright Freezer vs. Ice Storage Bin: Essential Guide for Irish Kitchens
Compare Unifrost upright freezers with ice storage bins for effective ice management in Irish commercial kitchens.
Read guideCompare Unifrost freezer options on Caterboss
For current product options, pricing and availability, continue to Caterboss.